Categories
Development

Top 10 Software Development Trends for 2023

2023 is here, and new technologies are emerging. But there are many innovations yet to come. As familiar markets and technologies are likely to surprise us with new advancements, it’s very likely that we’ll see the birth of new trends as the year goes along. Let’s have a look at 10 key software development trends to watch out For in 2023. 

Trends in software development 2023

Web 3.0

Web 3.0 aims to adopt technologies like machine learning, artificial intelligence, blockchain and many more to enhance user experience. It is also aimed at giving more control to the users over their data usage and visibility. 

Cloud Computing

Cloud is embraced not only by startups and businesses but also by governmental organizations. It’s very much possible that by the end of 2023, there will be a significant transition of businesses and institutes to Cloud.

Augmented Reality

Augmented Reality has gained popularity, especially in the entertainment and gaming industries. Augmented reality can help businesses provide more detailed information on their services and products.

Blockchain

With companies realizing blockchain’s ability to develop secure systems, it has been trending for the past few years. There is also no centralized authority to control the data, making blockchain safe from cyber threats.

DevSecOps

DevSecOps involves integration of security in the software development life cycle. This ensures that security is integrated at every level of the software. DevSecOps also helps identify security threats and vulnerabilities early, helping make secure, risk-free, and reliable software.

Python 

Python is ranked third after Java and C in terms of popularity and growth rate making the demand for the language increased twice. Python is also not difficult to learn, and it can be adapted to very complex projects with advanced levels of skill. 

Edge Computing

It is not the only computing innovation for the year but also Edge computing as it allows solving this problem by moving data to the edge of the local network, providing users the opportunity to use it both online and offline making it a prominent computing form. 

No-Code Development

As industries that aren’t digital by their nature such as agriculture, are undergoing rapid digital transformation. Hiring a software development team isn’t a top-priority expense, which made No-code development a web development trend. In 2023, this trend is anticipated to grow to other fields of software development as well.

Microservices Architecture

Microservices architecture is accelerating with the adoption of Cloud development. It involves breaking down large and complex applications into smaller independent services, reducing the risk of dependencies.

Kubernetes

Many organizations have adopted Kubernetes in 2022 and this number is going to increase in 2023. K8s is an open-source technology that is used to manage container technology for cloud computing. Due to the automation, Kubernetes offers the best use of the resources as well as the overall savings on ecosystem management.

Software development is the key to business growth. And with the wide range of needs and growing demands of consumers it is important to choose a highly skilled software development solutions provider who keeps up with the new technologies in software development and the trending technologies in software development 2023. We at Techcedence keep up with the latest software development trends to deliver the best in class Experience with our products and services. 

Categories
Development

Why are JavaScript Frameworks Leading the Pack for Frontend Development?

Have you realized Facebook, LinkedIn, Instagram, and Google have one thing in common? And what is it? Their interactivity and engagement. These two factors have made an integral part of our digital routines. 

But did you ever wonder what makes these platforms engaging, successful, and an inseparable aspect of the web? Of course, there isn’t one but many. And one among them is that they use JavaScript! Let’s learn how JavaScript drives the success of the websites and online platforms of many such global enterprises. 

6 Reasons JavaScript Frameworks Lead the Herd

As one of the leading JavaScript frontend development companies, we consider these reasons vital in making JavaScript the top frontend development framework.

Reasons JavaScript Frameworks Lead the Herd

1. AJAX

AJAX is Asynchronous JavaScript and XML. So, what does AJAX do? It enables interaction between a webpage and the web server in the background without a page reloading. 

For instance, let’s consider a listing of events on a particular webpage. The system sorts them according to month, the most recent, and then categorizes them by their type. 

When the developer changes the ‘ALL’ filter to the ‘General’ one, the system triggers an operation in the background. That enables the page to reload partially with the newly queried items. And, while doing so, it doesn’t flicker. Thus, you remain exactly where you are, which precisely makes up for an amazing and stable web experience.

2. Interactivity

JavaScript can perform various functions for a website. It can enable the developer to build rich UI components like pop-ups, image sliders, form validations, navigation mega menus, etc. Additionally, the framework provides extra functionality to the site, which isn’t possible with HTML or CSS alone. Furthermore, JavaScript enables webpages to respond to user activity and update themselves without a page reload.

3. Plugins

Some websites include chat support, content suggestions, banner ads, social sharing, etc. They are likely to be powered by a third-party JavaScript plugin. Generally speaking, these plugins offer various configurable options that demand an additional set-up to function appropriately. They are usually aimed at integrating with little to no modification. Developers should comprehensively understand these plugins to use them efficiently and effectively.

4. Easy Code Maintenance

JavaScript has the Model View Controller (MVC) mechanism that helps you organize your code efficiently and keep it clean. It breaks down the website into three parts – data (Model), data’s presentation to the user (View), and action taken on user interaction (Controller). The categorization helps keep the codes structured in JavaScript.

5. Classy Interfaces

This is another significant benefit. JavaScript’s various interfaces enable developers to develop elegant and gripping web pages. It allows them to integrate drag-and-drop components or sliders that provide the webpage with a rich and classy interface. As a result, users enjoy an enhanced interactive webpage experience.

6. Compatibility and Cross-Browser Support

Leading browsers like Google Chrome, Mozilla Firefox, and Internet Explorer have inbuilt JavaScript capabilities. Thus, as a company, you enjoy improved compatibility and seamless cross-browser support. Besides, you don’t have to download a particular plug-in or install separate software to view JavaScript, as was the case earlier.

Leverage JavaScript to deliver phenomenal web experiences with Techcedence! Our extensive experience and capabilities in JavaScript can help you build an interactive and engaging frontend that redefines user journeys. Connect with us at sales@techcedence.com to learn more about the value proposition.

Categories
Development

Off the Shelf Product Vs. Custom Application Development

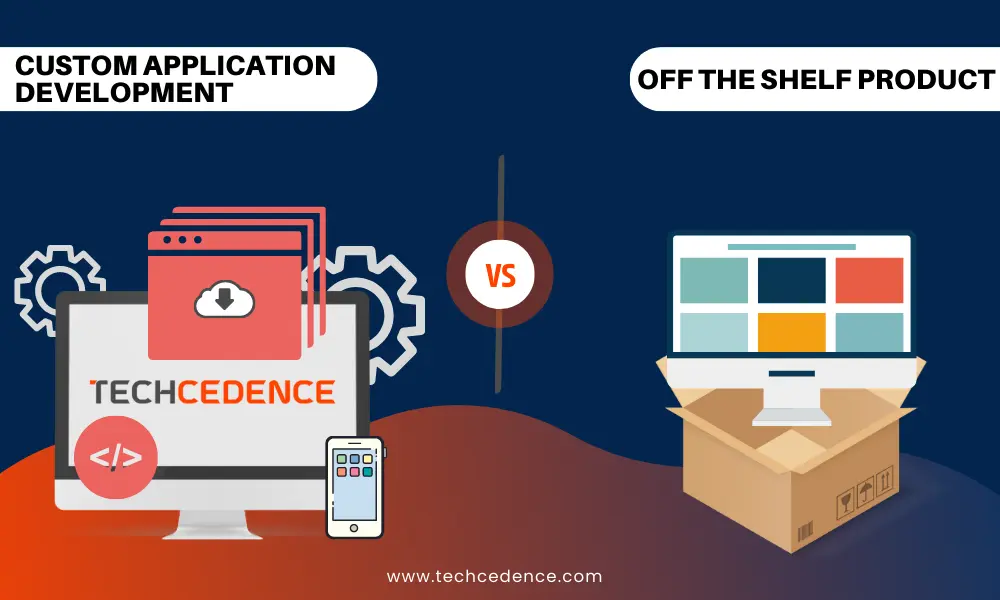
Whether to go for an off-the-shelf product, which is ready-to-use (and perhaps a plug-and-play solution), or a custom application development, which will demand investment, take time to shape but tailored to your needs? 

Almost every business, especially startups and SMEs with various constraints, confronts this question at some point. So, which one is a better choice? Is there a generic answer to this question, or should business owners take a situation-based call? Let’s find out.

What is an Off-the-Shelf Product?

An off-the-shelf software application is a readymade product ready to go out of the box. It is available to everyone and includes various features, out of which some or perhaps, all will be useful for a particular business. They aren’t tailored to a particular business’s needs. Hence, they follow the one-size-fits-all approach. 

Some common examples of off-the-shelf software applications include CRM, accounting applications, email services, operating systems, etc.

What is a Custom Application?

Bespoke application is a broad area and the default norm these days. Every business is unique, and hence comes with varying needs. So, using an off-the-shelf product seldom works. Businesses use custom application development to build software solutions aligned with their workflows. The tailored software application requires partnering with a custom software application development company to develop the solution.

Pros and Cons of Off-the-Shelf Products

Let’s look at some pros and cons of off-the-shelf products.

Pros of Off-the-Shelf Products

  • Readymade
  • Much more cost-effective than bespoke software
  • Save time and effort
  • Have user communities for assistance and guidance
  • Tested and proven solutions
  • Have a name and reputation in the market
  • Comprehensive enough to meet various business needs

Cons of Off-the-Shelf Products

  • It cannot be customized, or customization could be expensive
  • Some features and functionalities may be useless for a particular business
  • Slower to adapt to the changing industry needs
  • Updates and upgrades are controlled by the application’s makers

Pros and Cons of Custom Applications

Here are some advantages and disadvantages of tailored applications

Pros of Custom Applications

  • Highly customizable
  • Ownership remains with the client company
  • Greater scalability
  • A higher degree of security
  • Upgrades, updates, and changes are quick and more straightforward
  • Integration of customized features and functionalities
  • More aligned with business needs

Cons of Custom Applications

  • A high initial investment involved
  • Risk of a misaligned final product
  • Requires time to be developed
  • Not tested for all business cases
  • Problems are discovered by the user
  • Absence of community support

Off-the-Shelf vs. Custom Application Development – What Should I Choose?

So, we now come to the main question – off-the-shelf vs. custom application development – what to choose? Honestly, we will suggest you go for a custom application. Of course, we’ve listed the pros of custom applications. Yes. It also requires time and money to develop. But business matters more than everything else! 

So, suppose you are looking for an app synchronized with your business needs and objectives and a higher return on investment. In that case, a custom application is an option to choose from. 

But wait. Don’t rush to make a decision. Custom software applications may not necessarily be the right option. Off-the-shelf products work when you are fine with standard features, the business operation associated with the application isn’t as critical or requires customized functionalities, you don’t have time or the financial muscle to invest in a customized application, or you don’t need a custom software at the moment.

Nevertheless, if you are sure about your choice and need a custom application tailored to your needs, partner with Techcedence, one of the leading custom application development companies. Our extensive portfolio comprises bespoke app development for multiple domains. We develop applications after a thorough discussion of your business needs and objectives. Our support involves everything from conceptualization to maintenance and technical support.

Thus, choose Techcedence if you are looking for higher RoI on your investments and a tailored application stitched to your needs. Email us at sales@techcedence.com to learn more about our custom application development services.

Categories
Development

7 Tried, and True Methods for Reducing Software Development Costs While Maintaining Quality

Software development, especially custom software, could become an expensive affair, considering the various unique elements involved. The more specific you get in terms of resources and technologies, the higher the software development costs. 

Now you know you need a custom software solution. You cannot help that. But on the other hand, you cannot let the development cost blow out of proportion either! Besides, you have quality as an aspect to combat!

So, how do you control software development costs, especially while maintaining the desired levels of quality? Here are seven tested and proven ways.

1. Proper Planning Before Budgeting!

Do you budget a journey first and then plan it? Of course, not! You wouldn’t know what elements to involve in the budget if you do not have a plan in place. 

Software development also resembles a journey wherein you first put up a proper plan in place and then take up the budgeting aspect. The right way of doing it is to gather all the stakeholders and take valuable inputs concerning the software development plan, objectives, and the returns you expect from the venture.

You can have a software development consultant by your side, with whom you can coordinate while preparing the plan and the budget.

The consultant can help you categorize every aspect and prepare the cost estimate so that you can dedicate a particular monetary sum to each while keeping some buffer to accommodate unforeseen costs.

2. Choose the Right Development Approach

Right Development Approach

Software development has evolved significantly over the years. A crucial part of its evolution is the various development approaches. The most popular and highly cost-effective among these is the Agile methodology.

Agile is an iterative approach to software development. It enables the teams to deliver better and quicker value to their customers with fewer hassles to resolve. The approach involves creating smaller goals and delivering them instead of relying on the big launch. 

Agile development also includes continuous evaluation of plans, requirements, and results so that nothing comes in as an unpleasant surprise at the last moment. 

In other words, you exercise better control over the development part while controlling costs and maintaining quality.

3. Release an MVP

An MVP, as you may already know, is a Minimum Viability Product. It is representative of the actual product with fewer features and functionalities good enough to help you generate and receive target user feedback and response.

Building an MVP helps immensely. It helps you gather real-time user sentiment and enables you to identify areas that require changes, improvements, etc. The launch becomes much more informed with an MVP insight on hand. 

After all, you want your software to resonate with your users, who could be your employees, clients, etc. An MVP helps you save a considerable amount of costs otherwise incurred in making changes or redevelopment after the launch.

4. Choose Features Wisely

Out there, there’s so much to look at and use. Features aren’t an exception. Software development has progressed to the extent that software development companies can develop and integrate almost any feature their client wants. 

But here, what matters is what you and your users need in terms of features and functionalities. The more feature-rich your software application, the more expensive it gets. Thus, the key is to identify what you need during the initial stage. 

You might launch with a particular set of features and functionalities and then add or remove them per user needs, feedback, and evolving requirements. It will help you control costs while ensuring you deliver precisely what is required.

5. Select the Optimal Technology Stack

Optimal Technology Stack

When it comes to software development costs, technology plays a role equally decisive as features and functionalities. Thus, you should choose the right technologies with an expert and experienced software consultant by your side. 

The more popular the technology, the easier it is to find its developers and community support. But don’t let popularity alone drive your decision. Evaluate every technology to understand if it will serve your purpose or not. 

6. Include Quality Testing from the Early Stages

Every error found in the software application will cost you money. But imagine a bug is identified after the application has launched! The result is a huge amount of costs involved in resolving it. One secure approach to prevent such situations is to include quality from the early stages and keep it a part of the development process.

7. Outsource Software Development

Outsource Software Development

Outsourcing software development to a software development company benefits you in various ways. It saves efforts in building an in-house team and reduces overall project costs, as salaries, employee benefits, and infrastructural costs are the outsourcing company’s onus. But simultaneously, outsourcing allows you to broaden your talent access. You can have more experienced developers and testers onboard while restricting your role to reviewing the project progress and results. Thus, outsourcing helps ensure quality and, at the same time, cost-effectiveness.

Build cost-effective yet superior quality, scalable and robust custom software applications for your business domains with Techcedence. Our team of consultants, developers, testers, and other vital members help you make the right choices, execute your project on time, ensure product quality and help control cost across every stage.

We offer various engagement models to let you choose the best-suited from the cost, project control, and product quality perspective. Email us at sales@techcedence.com to learn more about our software development capabilities.

Categories
ASP.NET Core

Blazor Cascading Values and Parameters

This blog is going to explain how to pass values from parent component to child component. A cascading parameter and component is an easy way to flow data from parent to child components.

Basic Cascading Parameter and Component

I have created two components to illustrate the data flow Parent.razor and Child.razor. The following is a parent component. I’ve added a textbox to collect the result and send it to the child component. Next, the <CascadingValue> component is added.

It passes the cascading value to all child components.

In this example, I’ve added a <Child> component inside a <CascadingValue> component . The result value is assigned to the value attribute of the <CascadingValue> element.

To explain that I have created two components. 

Parent.razor and Child.razor. The following one is a Parent component. 

Here I have added a textbox to collect a result to pass to the child component. 

Next, <CascadingValue> component is added. 

This passes the cascading value to all the child components. 

In this example I have added <child> component inside the <CascadingValue> component. The result  variable is assigned to the  Value attribute of the  <CascadingValue> component.

Parent.razor
@page "/Parent"

<h3>Parent</h3>

Result: <input type="text" @bind="@result" />
<br />
<br />
<CascadingValue Value="@result">
    <Child></Child>
</CascadingValue>

@code {
    int result = 10;
}

The next code snippet is the child component code.

A receivedResult property variable is added here to get the value from the parent component.

Added [CascadingParameter] attribute on top of receivedResult variable.

So the receivedResult will get the nearest parent <CascadingValue> value.

Child.razor
@page "/Child"

<h4>Child Component</h4>
<p>Result: <b>@receivedResult</b></p>

@code {
    [CascadingParameter]
    int receivedResult { get; set; }
}

The following is a output of the above code samples

Blazor application

Cascade multiple values

Next, you’re going to see how to cascade multiple values ​​from the parent component to the child component.

In the parent component code below two text boxes have been added to collect the student name and age.

Name is String and Age is Numeric.

In the code below the child component is enclosed within two <CascadingValue> elements. One is to pass the student name and the other is to pass student age.

parent.razor
@page "/Parent"

<h3>Parent Component</h3>

Student Name: <input type="text" @bind="@stuName" />
 <br />
Age: <input type="text" @bind="@stuAge" />

<br /><br />

<CascadingValue Value="@stuName">
    <CascadingValue Value="@stuAge">
        <Child></Child>
    </CascadingValue>
</CascadingValue>

@code {
     string stuName = "Ed";
     int stuAge = 10;
}

The code below is the Child.razor code. Two property variables name and age are included with the [CascadingParameter] property. And the variables are displayed to show in the application.

Child.razor

@page "/Child"

<h4>Child Component</h4>

<p>Student Name: <b>@Name</b></p>
<p>Student Age: <b>@Age</b></p>

@code {
    [CascadingParameter]
    string Name { get; set; }

    [CascadingParameter]
    int Age { get; set; }
}

The below one is the output of above code.

Blazor Cascading Values and Parameters

Cascade multiple values by name

In the previous example, the cascading values ​​are different data types, one is string and the other numeric. But when you cascade the same data type, you need to set the name attribute in the <CascaddingValue> component. In the example below, the student name and favourite subject are assigned to the <CascadingValue> component. Here you can see that the name attribute is added to both the <CascaddingValue>

@page "/Parent"

<h3>Parent Component</h3>

Student Name: <input type="text" @bind="@studentName" />
<br />
Favourite Subject: <input type="text" @bind="@subject" />

<br />
<br />

<CascadingValue Value="@studentName" Name="name">
    <CascadingValue Value="@subject" Name="sub">
        <Child></Child>
    </CascadingValue>
</CascadingValue>

@code {
    string studentName = "Ed";
    string subject = "Maths";
}

The below one is the child component. Here you see the Name is added in     [CascadingParameter]. So based on this Name the cascading values will get bound.

@page "/Child"

<h4>Child Component</h4>

<p>Student Name: <b>@Name</b></p>
<p>Favourite Subject: <b>@Subject</b></p>

@code {
    [CascadingParameter (Name = "name")]
    string Name { get; set; }

    [CascadingParameter (Name = "sub")]
    string Subject { get; set; }
}

The following is an output of the above code.

blazor cascading parameters

Conclusion

This is how the Cascading Values and Parameters provide an easy way to send data down a component hierarchy from a parent component to any number of child components

Categories
ASP.NET Core

Developer Exception Page in ASP.NET Core

The developer exception page is a one of the error handling processes in ASP.Net Core. It will give you complete details about the exception.

To enable the Developer exception page app.UseDeveloperExceptionPage(); should be added in Configure method in Startup.cs file. The  app.UseDeveloperExceptionPage(); must appear before the middleware  which needs to handle the exception.

public void Configure(IApplicationBuilder app, IWebHostEnvironment env)
{
    if (env.IsDevelopment())
    {
    app.UseDeveloperExceptionPage();
    }
}

The Developer Exception  Page will have the following Information

  • Stack
  • Query
  • Cookies
  • Headers
  • Routing

Let’s look at a small example of how the exception is displayed in the browser without app.UseDeveloperExceptionPage() and app.UseDeveloperExceptionPage(). I  have commanded the exception handling process from the Configure method in Startup.cs 

public void Configure(IApplicationBuilder app, IWebHostEnvironment env)
{
    //if (env.IsDevelopment())
    //{
    //    app.UseDeveloperExceptionPage();
    //}
    //else
    //{
    //    app.UseExceptionHandler(“/Error”);
    //    app.UseHsts();
    //}

    app.UseHttpsRedirection();
    app.UseStaticFiles();
    app.UseRouting();
    app.UseAuthorization();
    app.UseEndpoints(endpoints =>
    {
    endpoints.MapRazorPages();
    });
}

The following is a screenshot of the exception. It does not clearly show what the exception is.

It Just says “This page isn’t working, localhost is currently unable to handle this request. HTTP ERROR 500”

Developer Exception

In the below code I have uncommanded the exception handling process.

public void Configure(IApplicationBuilder app, IWebHostEnvironment env)
{
    if (env.IsDevelopment())
    {
    app.UseDeveloperExceptionPage();
    }
    else
    {
    app.UseExceptionHandler(“/Error”);
    app.UseHsts();
    }

    app.UseHttpsRedirection();
    app.UseStaticFiles();
    app.UseRouting();
    app.UseAuthorization();
    app.UseEndpoints(endpoints =>
    {
     endpoints.MapRazorPages();
    });
}

The following is a screenshot of the Developer Exception page. It clearly states what the exception is. It also shows on which page and line it is occurring.

pasted image

Note:

Enable the Developer Exception Page exception in the developer environment to avoid sharing the exception details in public.

If you have any questions, please leave a comment below.

Categories
ASP.NET Core

Data Binding in Blazor

Data binding is one of the most important processes in an application. Data binding is achieved through the @bind attribute in the Blazor component.

@bind attribute

The following code is an example of data binding to a textbox. This is a Blazor component code, so it contains the HTML tag and @code block in a file. Here the TextValue property value is assigned to the @bind attribute. The property value TextValue will update when the textbox loses focus. To display the updated value, the TextValue  will be displayed within the strong tag.

@page “/”

<h4>Data Binding</h4>

<input @bind=”TextValue” />

<br />
<div>
    <span>The Textbox value is: </span> <strong>@TextValue</strong>
</div>

@code {
    private string TextValue { get; set; }
}

The following is the output of the above code. Here you can see how the values are updated when the textbox loses its focus.

Data Binding in Blazor example 1

@bind:event attribute

The code below is the same as the code above. But it has @bind:event in input element. In the previous example, the textbox element updates the property variable when it loses focus. But in this example it is updated at the time of typing text using the @bind:event.

@page “/”

<h4>Data Binding</h4>

<input @bind=”TextValue” @bind:event=”oninput” />

<br />
<br />
<div>
    <span>The Textbox value is: </span> <strong>@TextValue</strong>
</div>

@code {
    private string TextValue { get; set; }
}

The following is the output of the above code. Here you can see how the values are updated when typing the text in the textbox.

Data Binding in Blazor example 2

@bind-{ATTRIBUTE} and @bind-{ATTRIBUTE}:event attributes

@bind-{ATTRIBUTE} and @bind-{ATTRIBUTE}:event helps bind the attributes. In the code below @bind-style and @bind-style:event attributes are added to the div tag. So when you set the style attribute in the textbox it will change into the div element.

@page “/”

<h4>Attribute Binding</h4>

<input type=”text” @bind=”StyleValue” />

<br />
<br />

<div @bind-style=”StyleValue” @bind-style:event=”onchange”>
    Demo Attribute Binding!
</div>

@code {
    private string StyleValue = “color:red”;
}

The following is the output of the above code. Here you can see how the div content color changes when changing the color name in the textbox.

Data Binding in Blazor exmple 3

This article explains how the @bind attribute binds value in the blazer.

If you have any questions please comment below.

Categories
ASP.NET Core

Route Templates in ASP.NET CORE Blazor

The term routing in Blazor is moving or navigating between the Blazor components. The Blazor provides a client-site routing mode. In this blog, let us see what is Route Templates in ASP.NET CORE Blazor.

In the Blazor application, the Router component is present inside the App.razor file.

The following is a default Router Component.

<Router AppAssembly=”@typeof(Program).Assembly“>
    <Found Context=”routeData”>
        <RouteView RouteData=”@routeData DefaultLayout=”@typeof(MainLayout) />
    </Found>
    <NotFound>
        <LayoutView Layout=”@typeof(MainLayout)“>
            <p>Sorry, there’s nothing at this address.</p>
        </LayoutView>
    </NotFound>
</Router>

The Router component will provide the route data to the RouteView from the current navigation site. When matching is found for the requested route, the RouteView Component will populate the specified component inside the layout. If the requested route is not found, then the NotFound component will populate the content. From the above code it will display “Sorry, there’s nothing at this address.” message. Also, the user can customize the content for their needs.

Route Template

The Route Template is defined by adding the @page directive at the top of the component. @page directive will convert into RouteAttribute at the time of compiling the code. In the below snippet, the @page directive added as @page “/”. So when accessing a URL, say https://www.domainname.com/ it will display the component

@page “/”
<h1> Hello, Blazor!</ h1>
Welcome to your Blazor App lication.

https://www.domainname.com/index URL will display the below component.

@page “/ index
<h1> Hello, Index Page!</ h1>
Welcome to Index Page.

Multiple Route

A single component may have multiple route templates. Consider the following component. Here, two different @page directives are stacked in the file. So it will provide multiple routes to the same component.

@page  /BlazorRoute
@page  /AnotherBlazorRoute
<h1> Blazor Multiple Routing</h1>

https://www.domainname.com/BlazorRoute and https://www.domainname.com/AnotherBlazorRoute both URLs will display the same above component

Route parameters

@page “/BlazorRoute”
@page “/BlazorRoute/{ParameterText}”
@if  (string.IsNullOrWhiteSpace(ParameterText))
{
    <h1 >Blazor Route Without Parameter</h1 >
}
else
{
    <h1 >Blazor Route With Parameter: @ParameterText </h1>
}
@code {
    [Parameter]
    public  string ParameterText { get set; }

In the above code snippet, two @page directives are added. The first directive is to navigate without parameter and the second one is to navigate with parameter. The parameter is defined with curly brackets. [Parameter] attribute has been added to the ParameterText property variable to denote it as a component parameter.

https://localhost:44316/BlazorRoute/ will give the following output:

Blazor Route without Parameter

https://localhost:44316/BlazorRoute/My%20Parameter this URL will provide the following output.

Blazor Route with Parameter

Route constraints

@page “/BlazorRoute/{ID:int}/{TextParameter}”
<h1> The given integer value is @ID</ h1>
<h1> The given text parameter value is @TextParameter </h1>
@code {
    [Parameter]
    public  int ID { get set; }
    [Parameter]
    public  string TextParameter { get set;}
}

The above code snippet illustrates how to pass multiple parameters and route constraints. The ID parameter solely accepts the integer value[{ID:int}]. And the TextParameter will accept the string value. The following image is an output of the above code. https://localhost:44316/BlazorRoute/5/my%20parameter

Blazor Route constraints

The user needs to pass both ID and TextParameter parameters otherwise the output will show the message with the NotFound Component.

If you have any questions, please leave a comment.

Categories
ASP.NET Core

Basic Event Handling in Blazor

This article is to explain how event handling works in Blazor. The @on{event} attribute in Razor is the event handling attribute. The {event} may be any event. For example, For button @onclick is a click event. In checkbox @onchange is a change event it will trigger, when checking or unchecking the checkbox.

The following is an example for @onclick. In this code, the @page directive is added for routing. Then @result property value is added to display the result. Then the @onclick attribute is added to the button and the DisplayMessage method is assigned to it. When the user clicks the button it will display the message.

@page “/”

<div>@result</div>

<br />
<button @onclick=”DisplayMessage”>Click Here</button>

@code
{
    public string result { get; set; }

    void DisplayMessage()
    {
        result = “The button is clicked”;
    }
}

The following is an output of the above code.

Event Handling

Lambda Expressions

You can achieve the same result as above using lambda expressions.

@page “/”

<div>@result</div>

<br />
<button @onclick=”@(e=>DisplayMessage())”>Click Here</button>

@code
{
    public string result { get; set; }

    void DisplayMessage()
    {
        result = “The button is clicked”;
    }
}

Also, you can pass arguments to the @onclick method using the Lambda expression.

The following code explains how to pass arguments. Here in GetSum() method two arguments a and b are passed.

@page “/”

Sum of 1 + 2 = <strong>@result</strong>

<br /><br />
<button @onclick=”@(e=>GetSum(1, 2))”>Sum</button>

@code
{
    public int? result { get; set; }

    void GetSum(int a, int b)
    {
        result = 1 + 2;
    }
}

The following is an output of the above code.

Event Handling

This article explains what is event handling in Blazor and how to pass parameters to an event handler.

If you have questions, please leave your comments.

Categories
ASP.NET Core

Turn on CircuitOption.DetailedError in Blazor

This article is going to explain how to enable CircuitOption.DetailedError in the development environment.

Let us look at a small example. The following is the Blazor component code. It contains both HTML and @code block. GetArray() method is defined in the @code module. In it, the array is initialized with four elements.  Finally, arr [5] is assigned to the result variable so that it triggers an index outside the range exception.

@page “/”

<h4>Turn on CircuitOption.DetailedError</h4>

<button @onclick=”GetArray”>Trigger the Exception</button>

@code
{
    void GetArray()
    {
        int[] arr = new int[] { 1, 2, 3, 4 };
        int result = arr[5];
    }
}

The following screenshot illustrates how the exception is displayed in the browser. It states, Error: There was an unhandled exception on the current circuit, so this circuit will be terminated. For more details turn on detailed exceptions in ‘CircuitOptions.DetailedErrors’.

CircuitOption.DetailedError

Let us see how to enable the CircuitOption.DetailedError.

In the Startup.cs file, IWebHostEnvironment  is initialized to provide web hosting environment information. Added  IWebHostEnvironment  in Startup constructor. Finally, AddCircuitOptions has been added in the ConfigureServices method, which helps to configure circuits.

In this code _Env.Is Development () is checked to confirm if it is a development environment or not. If it is a development environment, then only it will display the detail error.

private readonly IWebHostEnvironment _env;

public Startup(IConfiguration configuration, IWebHostEnvironment env)
{
    Configuration = configuration;
    _env = env;
}

public void ConfigureServices(IServiceCollection services)
{
    services.AddRazorPages();

    services.AddServerSideBlazor().AddCircuitOptions(options => {
       if (_env.IsDevelopment())
      {
        options.DetailedErrors = true;
      }
    });

    services.AddSingleton<WeatherForecastService>();
}

The following screenshot illustrates how the browser displays the error after enabling a detailed error. It clearly states what the error is and shows which file it is and which line number it occurs.

CircuitOption.DetailedError in Blazor

The blog explains how to enable CircuitOption.DetailedError in the development environment.

If you have any questions, please leave a comment.