This blog will explain how to implement Forms and Validation in Blazor. The EditForm component aids in the validation of webforms and data annotations.
Let’s look at how the EditForm component handles data annotation validation.
Consider the Student class file below.
All of the class properties are marked with the [Required] attribute in this case. It specifies that the value of the data field is required. [MinLength(3)] attributes are assigned to the Name. It specifies the shortest string data allowed in name. The [Range] attribute is assigned to the DateOfBirth property. The range has been set to “1/1/2000” to “1/1/2010”. As a result, the date of birth should be between “1/1/2000” and “1/1/2010”. Also, the ErrorMessage property has been set, so if the user enters an invalid date of birth, the error message will be displayed.
Demo.cs
using System.ComponentModel.DataAnnotations;

namespace SampleBlazorApp.Data
{
    public class Student
    {
        [Required]
        [MinLength(3)]
        public string Name{ get; set; }

        [Required]
        public string Gender { get; set; }

        [Required]
        [Range(typeof(DateTime), "1/1/2000", "1/1/2010",
        ErrorMessage = "The date of birth should between 1/1/2000 to 1/1/2010")]
        public DateTime DateOfBirth { get; set; } = Convert.ToDateTime("1/1/2000");
    }
}
The code for a razor component is as follows. A form attribute is created by the EditForm element. It displays the form element. In the @code area, the student model is created. The student model is assigned the Model attribute in the EditForm component. As a result, it binds the student model to the form. The SaveData method is assigned to the EditForm‘s OnValidSubmit attribute. The SaveData method will be executed if no validation errors occur. For example, if any of the input fields are empty, the validation summary will display the message like “The name field is required”. That means the validation process isn’t finished. The SaveData method is not called in such cases.
In the code below, an InputText component is added to add and edit string values. The InputDate component has been added to collect the date of birth value. The @bind-Value directive attribute aids in binding model values to the component value properties InputText and InputDate.
index.cshtml
@page "/"
@using SampleBlazorApp.Data
<EditForm Model="@student" OnValidSubmit="SaveData">
<DataAnnotationsValidator />
<ValidationSummary />
<p>
First Name:
<InputText @bind-Value="@student.FirstName"></InputText>
</p>
<p>
Last Name:
<InputText @bind-Value="@student.LastName"></InputText>
</p>
<p>
Gender:
<InputText @bind-Value="@student.Gender"></InputText>
</p>
<p>
Date of Birth:
<InputDate @bind-Value="@student.DateOfBirth"></InputDate>
</p>
<p>
Address:
<InputText @bind-Value="@student.Address"></InputText>
</p>
<button type="submit">Submit</button>
</EditForm>
@code {
private Student student = new Student();
private void SaveData()
{
// data save code
}
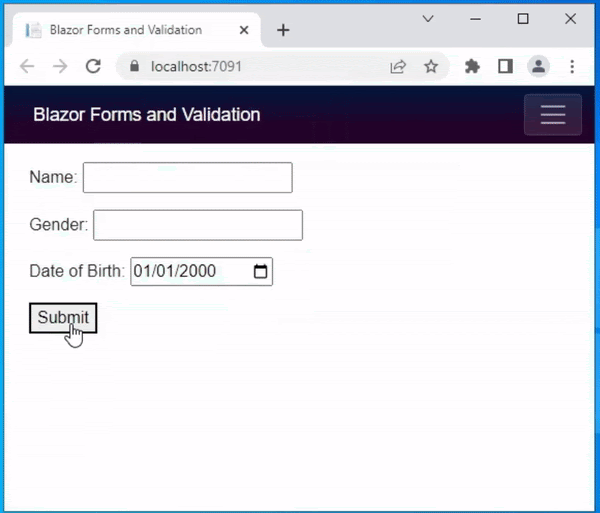
}The following is the output of the above code. Here you can see that when the user clicks on the submit button it gives a summary error message. The error message disappears when the user enters the correct values.
Must True Validation
The user may be required to acknowledge something like ‘I accept the terms and conditions’ at times. If this is the case, the checkbox must be selected before submitting the form. Let’s look at how to do that with data annotation validation.
A demo class file is provided below. It has two properties: Name and IsAccepted. The property IsAccepted must be true. So, the range validation attribute was used here. The data type bool has been specified. The minimum and maximum values are both set to “true.” If it is false, it means the user did not check the checkbox, and the error message will be displayed.
Demo.cs
using System.ComponentModel.DataAnnotations;
namespace SampleBlazorApp.Data
{
    public class Demo
    {
        [Required]
        [MinLength(2)]
        public string Name { get; set; }

        [Range(typeof(bool), "true", "true",
            ErrorMessage = "Accept the terms and conditions")]
        public bool IsAccepted { get; set; }
    }
}
The following is a razor page code.
index.razor
@page "/"
@using SampleBlazorApp.Data
<EditForm Model="@demo" OnValidSubmit="SaveData">
<DataAnnotationsValidator />
<ValidationSummary />
<p>
Name:
<InputText @bind-Value="@demo.Name"></InputText>
</p>
<p>
<InputCheckbox @bind-Value="@demo.IsAccepted"></InputCheckbox> I accept the terms and conditions
</p>
<button type="submit">Submit</button>
</EditForm>
@code {
private Demo demo = new Demo();
private void SaveData()
{
// data save code
}
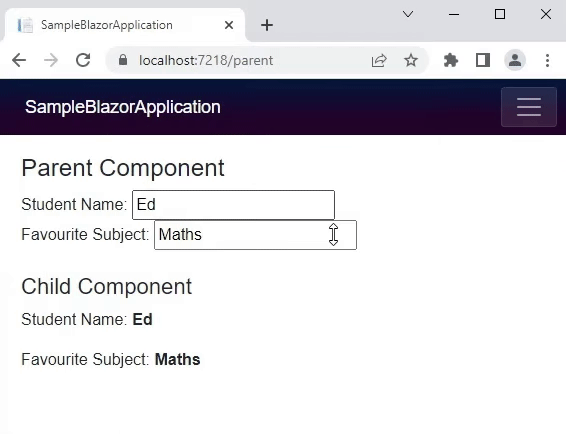
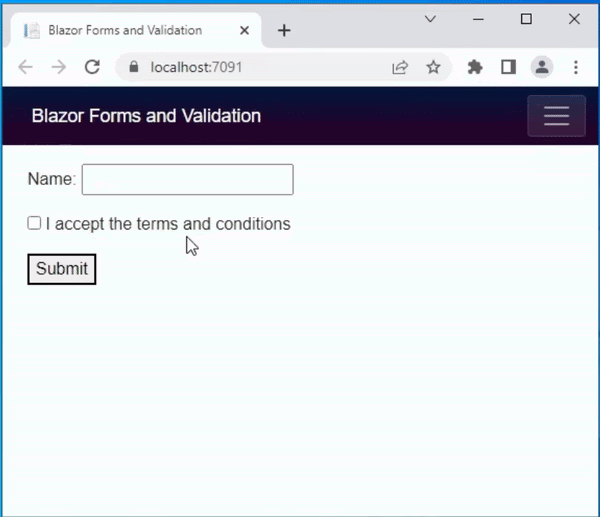
}The image below is the result of the above code. The range validation is demonstrated here.
Validation for Specific Field
The preceding examples demonstrate how to display the error message in summary. However, if you want to display a specific error message, you can use the <ValidationMessage> component. The code below demonstrates the specific field validation. The <ValidationMessage> attribute has been added next to the Name and Age textboxes.
index.cshtml
@page "/"
@using SampleBlazorApp.Data
<EditForm Model="@demo" OnValidSubmit="SaveData">
<DataAnnotationsValidator />
<p>
Name:
<InputText @bind-Value="@demo.Name"></InputText>
<ValidationMessage For="@(() => demo.Name)" />
</p>
<p>
Age:
<InputNumber @bind-Value="@demo.Age" ></InputNumber>
<ValidationMessage For="@(() => demo.Age)" />
</p>
<button type="submit">Submit</button>
</EditForm>
@code {
private Demo demo = new Demo();
private void SaveData()
{
// data save code
}
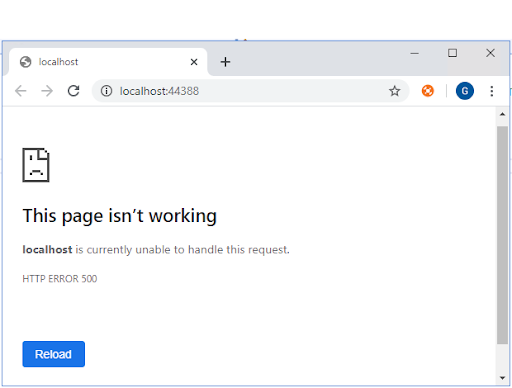
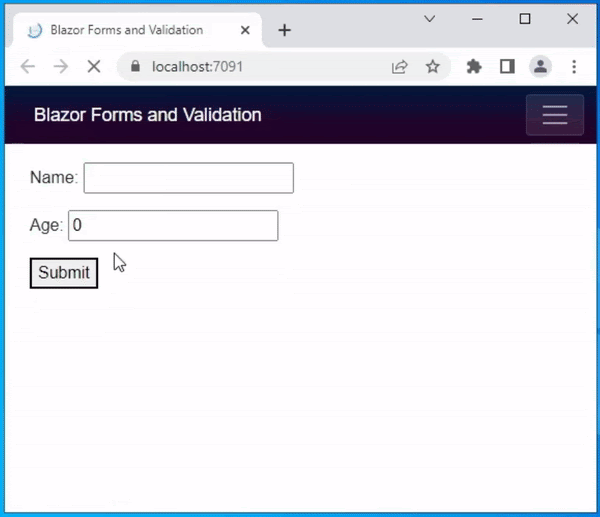
}The above code produced the following result. When the user enters the age 5 here, the error message appears right next to the age textbox.
Handle Form Submission
To handle the form submission, the EditForm provide following callbacks
OnValidSubmit – This will call the assigned event handler when the user has entered all valid entries
OnInvalidSubmit – This will call the assigned event handler when the input value is no or any value is invalid
OnSubmit – This will call the assigned event handler whether the form is valid or not.
Built-in form component
The Blazer framework provides some built-in input components to obtain input values. The following is a list of built-in form elements
| Input Component | Rendered Element |
| InputCheckbox | <input type=”checkbox”> |
| InputDate | <input type=”date”> |
| InputFile | <input type=”file”> |
| InputNumber | <input type=”number”> |
| InputRadio | <input type=”radio”> |
| InputRadioGroup | Group of child InputRadio |
| InputSelect | <select> |
| InputText | <input> |
| InputTextArea | <textarea> |
Conclusion
From this blog you can understand how form and data annotation validation works in Blazor. Also, You can also find coding examples for various types of validation. I hope you find this blog useful.
Read our blog for valuable insights on Static Image in Blazor