Categories
Mobile App Development

Cross Platform Mobile Application Development

Mobile apps are considered mandatory for businesses like banking, car rental and eCommerce. Android and iOS are the most widely used mobile platforms. For better reach, a mobile application should run on both Android and iOS mobile devices.

Developing a mobile application can be done in two ways. Either develop an app individually for each platform – iOS and Android. Alternatively, develop a common app that can run on different platforms.

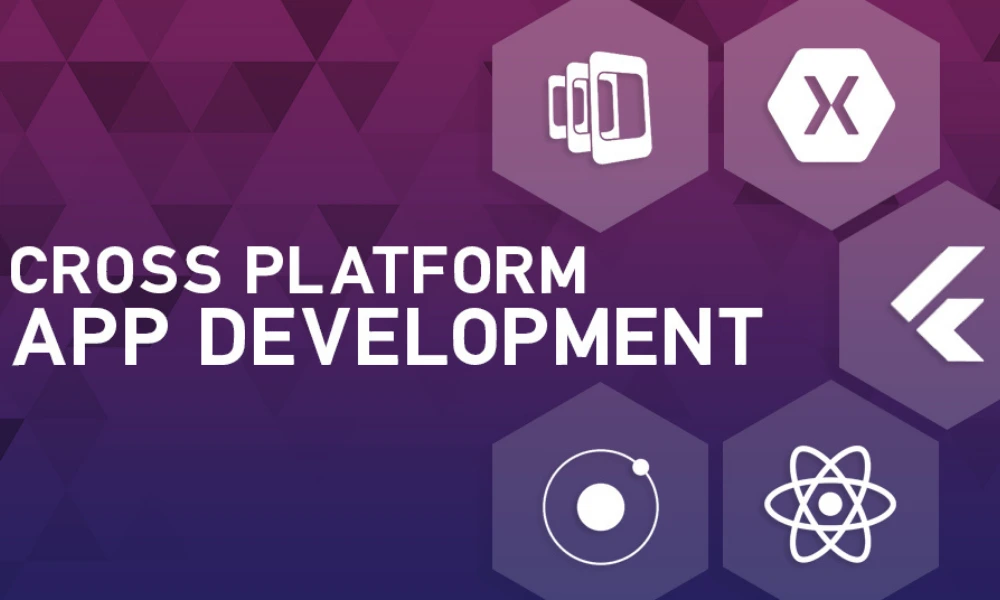
Cross-platform development refers to the creation of a mobile application that can run on multiple mobile operating systems. Cross-platform apps are developed using common technologies like HTML, Javascript, .NET and CSS.  The advantage of having a cross-platform app is it is easier to develop a single code base common to multiple platforms, quicker development time and it is cost-effective. Because of these advantages, the cross-platform framework is a preferred choice among small and large enterprises.

Cross-platform apps can be deployed on Google and Apple play store.

Cross-Platform Mobile Framework

To build a cross-platform mobile app requires a mobile app development framework. Though there are many options available, some of the popular frameworks include:

Ionic

It is an open-source framework to develop cross-platform applications for web, iOS, and Android using a single code base. Ionic is built on Angular JS technologies and allows the developer to use HTML5, CSS and Javascript. It takes less time, resources and effort to develop cross-platform applications using IonicJS. Another advantage of using Ionic JS is that it uses plugins allowing developers to create feature-rich mobile applications.  Ionic framework is the choice of developers aiming to create cross-platform applications without compromising quality.

Advantages:

  • Open source and Free
  • Less development time and effort
  • Built on Angular JS
  • Integrates seamlessly with native functionality

Disadvantages:

  • Less secure
  • Not suitable to build complex apps

React Native 

React Native created by Facebook uses javascript framework. Coding is easier as a single javascript code can be used for both iOS and Android platforms. This reduces development time and effort. The framework also supports reusing inbuilt components. Apps developed using React Native can easily integrate with existing mobile applications like GPS.

Advantages:

  • The open-source platform allows the integration of plugins.
  • Allows code reusability between platforms
  • Performance as good as a native app

Disadvantages

  • Javascript does not support decimals. So this framework will not be suitable to develop an app that requires mathematical computations.

Flutter

Flutter is a mobile app SDK by Google to develop applications for Android and iOS. This open-source platform recently launched in 2018 allows building highly interactive interfaces. A single codebase can be used for both iOS and Android development. This dart based framework comes with a library of widgets and tools. It supports Hot Reload which means any changes to the code can be seen immediately on the app.

Advantages:

  • Free and open source
  • App development with Flutter takes very less time
  • The widgets can be used to develop a visually attractive interface

Disadvantages:

  • Though Google provides libraries, some of the functions have to be built which is time-consuming.

Xamarin

Xamarin is based on the .NET framework and provided by Microsoft. It uses C# to create mobile apps. The code can be reused between iOS and Android applications. Xamarin can be used to develop user-friendly apps within less time. Updates and maintenance are made easier in Xamarin by updating the source file which is reflected on iOS and Android apps.

Advantages:

  • The same level of performance as in the native app.

Disadvantages:

  • It comes with license cost.
  • Xamarin based apps can occupy more space and takes more download time

PhoneGap

PhoneGap by Adobe is another popular cross-platform development tool. It is an open-source framework that allows developers to create mobile applications using HTML5, JavaScript and CSS. It allows creating app for different platforms using a single code base.

Advantages:

  • It gives access to device hardware such as camera, geolocation and accelerometer
  • Easy to develop as web developers need not have extra skills.

Disadvantages:

  • The performance of the application can be a little less when compared to native app.
  • It does not have enough UI widgets resulting in more development time.

A framework is an important tool for building a mobile application. Each framework has its own advantages. Depending on the requirement you can select the appropriate framework for developing the application.

If your business has end-users from both iOS and Android devices, it would be ideal to opt for hybrid apps. Techcedence has expertise in developing native and hybrid mobile applications and our experts can assist you in deciding on the best app development for your business.

Categories
ASP.NET Core

Data Binding in Blazor

Data binding is one of the most important processes in an application. Data binding is achieved through the @bind attribute in the Blazor component.

@bind attribute

The following code is an example of data binding to a textbox. This is a Blazor component code, so it contains the HTML tag and @code block in a file. Here the TextValue property value is assigned to the @bind attribute. The property value TextValue will update when the textbox loses focus. To display the updated value, the TextValue  will be displayed within the strong tag.

@page “/”

<h4>Data Binding</h4>

<input @bind=”TextValue” />

<br />
<div>
    <span>The Textbox value is: </span> <strong>@TextValue</strong>
</div>

@code {
    private string TextValue { get; set; }
}

The following is the output of the above code. Here you can see how the values are updated when the textbox loses its focus.

Data Binding in Blazor example 1

@bind:event attribute

The code below is the same as the code above. But it has @bind:event in input element. In the previous example, the textbox element updates the property variable when it loses focus. But in this example it is updated at the time of typing text using the @bind:event.

@page “/”

<h4>Data Binding</h4>

<input @bind=”TextValue” @bind:event=”oninput” />

<br />
<br />
<div>
    <span>The Textbox value is: </span> <strong>@TextValue</strong>
</div>

@code {
    private string TextValue { get; set; }
}

The following is the output of the above code. Here you can see how the values are updated when typing the text in the textbox.

Data Binding in Blazor example 2

@bind-{ATTRIBUTE} and @bind-{ATTRIBUTE}:event attributes

@bind-{ATTRIBUTE} and @bind-{ATTRIBUTE}:event helps bind the attributes. In the code below @bind-style and @bind-style:event attributes are added to the div tag. So when you set the style attribute in the textbox it will change into the div element.

@page “/”

<h4>Attribute Binding</h4>

<input type=”text” @bind=”StyleValue” />

<br />
<br />

<div @bind-style=”StyleValue” @bind-style:event=”onchange”>
    Demo Attribute Binding!
</div>

@code {
    private string StyleValue = “color:red”;
}

The following is the output of the above code. Here you can see how the div content color changes when changing the color name in the textbox.

Data Binding in Blazor exmple 3

This article explains how the @bind attribute binds value in the blazer.

If you have any questions please comment below.

Categories
ASP.NET Core

Route Templates in ASP.NET CORE Blazor

The term routing in Blazor is moving or navigating between the Blazor components. The Blazor provides a client-site routing mode. In this blog, let us see what is Route Templates in ASP.NET CORE Blazor.

In the Blazor application, the Router component is present inside the App.razor file.

The following is a default Router Component.

<Router AppAssembly=”@typeof(Program).Assembly“>
    <Found Context=”routeData”>
        <RouteView RouteData=”@routeData DefaultLayout=”@typeof(MainLayout) />
    </Found>
    <NotFound>
        <LayoutView Layout=”@typeof(MainLayout)“>
            <p>Sorry, there’s nothing at this address.</p>
        </LayoutView>
    </NotFound>
</Router>

The Router component will provide the route data to the RouteView from the current navigation site. When matching is found for the requested route, the RouteView Component will populate the specified component inside the layout. If the requested route is not found, then the NotFound component will populate the content. From the above code it will display “Sorry, there’s nothing at this address.” message. Also, the user can customize the content for their needs.

Route Template

The Route Template is defined by adding the @page directive at the top of the component. @page directive will convert into RouteAttribute at the time of compiling the code. In the below snippet, the @page directive added as @page “/”. So when accessing a URL, say https://www.domainname.com/ it will display the component

@page “/”
<h1> Hello, Blazor!</ h1>
Welcome to your Blazor App lication.

https://www.domainname.com/index URL will display the below component.

@page “/ index
<h1> Hello, Index Page!</ h1>
Welcome to Index Page.

Multiple Route

A single component may have multiple route templates. Consider the following component. Here, two different @page directives are stacked in the file. So it will provide multiple routes to the same component.

@page  /BlazorRoute
@page  /AnotherBlazorRoute
<h1> Blazor Multiple Routing</h1>

https://www.domainname.com/BlazorRoute and https://www.domainname.com/AnotherBlazorRoute both URLs will display the same above component

Route parameters

@page “/BlazorRoute”
@page “/BlazorRoute/{ParameterText}”
@if  (string.IsNullOrWhiteSpace(ParameterText))
{
    <h1 >Blazor Route Without Parameter</h1 >
}
else
{
    <h1 >Blazor Route With Parameter: @ParameterText </h1>
}
@code {
    [Parameter]
    public  string ParameterText { get set; }

In the above code snippet, two @page directives are added. The first directive is to navigate without parameter and the second one is to navigate with parameter. The parameter is defined with curly brackets. [Parameter] attribute has been added to the ParameterText property variable to denote it as a component parameter.

https://localhost:44316/BlazorRoute/ will give the following output:

Blazor Route without Parameter

https://localhost:44316/BlazorRoute/My%20Parameter this URL will provide the following output.

Blazor Route with Parameter

Route constraints

@page “/BlazorRoute/{ID:int}/{TextParameter}”
<h1> The given integer value is @ID</ h1>
<h1> The given text parameter value is @TextParameter </h1>
@code {
    [Parameter]
    public  int ID { get set; }
    [Parameter]
    public  string TextParameter { get set;}
}

The above code snippet illustrates how to pass multiple parameters and route constraints. The ID parameter solely accepts the integer value[{ID:int}]. And the TextParameter will accept the string value. The following image is an output of the above code. https://localhost:44316/BlazorRoute/5/my%20parameter

Blazor Route constraints

The user needs to pass both ID and TextParameter parameters otherwise the output will show the message with the NotFound Component.

If you have any questions, please leave a comment.

Categories
ASP.NET Core

Basic Event Handling in Blazor

This article is to explain how event handling works in Blazor. The @on{event} attribute in Razor is the event handling attribute. The {event} may be any event. For example, For button @onclick is a click event. In checkbox @onchange is a change event it will trigger, when checking or unchecking the checkbox.

The following is an example for @onclick. In this code, the @page directive is added for routing. Then @result property value is added to display the result. Then the @onclick attribute is added to the button and the DisplayMessage method is assigned to it. When the user clicks the button it will display the message.

@page “/”

<div>@result</div>

<br />
<button @onclick=”DisplayMessage”>Click Here</button>

@code
{
    public string result { get; set; }

    void DisplayMessage()
    {
        result = “The button is clicked”;
    }
}

The following is an output of the above code.

Event Handling

Lambda Expressions

You can achieve the same result as above using lambda expressions.

@page “/”

<div>@result</div>

<br />
<button @onclick=”@(e=>DisplayMessage())”>Click Here</button>

@code
{
    public string result { get; set; }

    void DisplayMessage()
    {
        result = “The button is clicked”;
    }
}

Also, you can pass arguments to the @onclick method using the Lambda expression.

The following code explains how to pass arguments. Here in GetSum() method two arguments a and b are passed.

@page “/”

Sum of 1 + 2 = <strong>@result</strong>

<br /><br />
<button @onclick=”@(e=>GetSum(1, 2))”>Sum</button>

@code
{
    public int? result { get; set; }

    void GetSum(int a, int b)
    {
        result = 1 + 2;
    }
}

The following is an output of the above code.

Event Handling

This article explains what is event handling in Blazor and how to pass parameters to an event handler.

If you have questions, please leave your comments.

Categories
ASP.NET Core

Turn on CircuitOption.DetailedError in Blazor

This article is going to explain how to enable CircuitOption.DetailedError in the development environment.

Let us look at a small example. The following is the Blazor component code. It contains both HTML and @code block. GetArray() method is defined in the @code module. In it, the array is initialized with four elements.  Finally, arr [5] is assigned to the result variable so that it triggers an index outside the range exception.

@page “/”

<h4>Turn on CircuitOption.DetailedError</h4>

<button @onclick=”GetArray”>Trigger the Exception</button>

@code
{
    void GetArray()
    {
        int[] arr = new int[] { 1, 2, 3, 4 };
        int result = arr[5];
    }
}

The following screenshot illustrates how the exception is displayed in the browser. It states, Error: There was an unhandled exception on the current circuit, so this circuit will be terminated. For more details turn on detailed exceptions in ‘CircuitOptions.DetailedErrors’.

CircuitOption.DetailedError

Let us see how to enable the CircuitOption.DetailedError.

In the Startup.cs file, IWebHostEnvironment  is initialized to provide web hosting environment information. Added  IWebHostEnvironment  in Startup constructor. Finally, AddCircuitOptions has been added in the ConfigureServices method, which helps to configure circuits.

In this code _Env.Is Development () is checked to confirm if it is a development environment or not. If it is a development environment, then only it will display the detail error.

private readonly IWebHostEnvironment _env;

public Startup(IConfiguration configuration, IWebHostEnvironment env)
{
    Configuration = configuration;
    _env = env;
}

public void ConfigureServices(IServiceCollection services)
{
    services.AddRazorPages();

    services.AddServerSideBlazor().AddCircuitOptions(options => {
       if (_env.IsDevelopment())
      {
        options.DetailedErrors = true;
      }
    });

    services.AddSingleton<WeatherForecastService>();
}

The following screenshot illustrates how the browser displays the error after enabling a detailed error. It clearly states what the error is and shows which file it is and which line number it occurs.

CircuitOption.DetailedError in Blazor

The blog explains how to enable CircuitOption.DetailedError in the development environment.

If you have any questions, please leave a comment.

Categories
ASP.NET Core

ASP.NET Core Service Scope

Singleton vs Scoped vs Transient

This article describes the service scope in ASP.NET Core and the difference between AddSingleton, AddScoped and AddTransient  methods. Let us see the following example that shows the lifetime of the services

The following is an interface. This interface only returns a string unique ID (GuidID).

IRepository.cs

public interface IRepository
{
   string GetUniqueID();
}

The below code is an implementation of the above interface. It has a constructor MyRepository which creates a unique ID when the object is created. The final one is GetUniqueID() which returns the unique ID.

MyRepository.cs

public class MyRepository : IRepository
{
    private string uniqueID;

    public MyRepository()
    {
        uniqueID = Guid.NewGuid().ToString();
    }

    public string GetUniqueID()
    {
        return uniqueID;
    }
}

AddSingleton

AddSingleton will generate an instance when requested for the first time. Then it will use the same instance for further request.

To use the service first, you must register with the ConfigureService method in Startup.cs. This ConfigureServices method enables you to add services to the application. Here I have added AddSingleton service with Service Type IRepository and implementation MyRepository

Startup.cs

public void ConfigureServices(IServiceCollection services)
 {
     services.AddSingleton<IRepository, MyRepository>();
     services.AddControllersWithViews();
 }

The following is a HomeController code. Here the IRepository service is injected in HomeController construction. In the Index action method uniqueID is received from GetUniqueID() method and assigned to ViewData[“UniqueID”]

HomeController.cs

public class HomeController : Controller
    {
        public IRepository _myRepository { get; set; }

        public HomeController(IRepository myRepository)
        {
            _myRepository = myRepository;
        }

        public IActionResult Index()
        {
            string uniqueID = _myRepository.GetUniqueID();
            ViewData[“UniqueID”] = uniqueID;
            return View();
        }
    }

The following is an Index view code. The unique ID in ViewData [“UniqueID”] is shown here and a partial view named UniquePartialView has been added to the view.

Index.cshtml

@{
    Layout = null;
    ViewData[“Title”] = “ASP.NET Core Service Scope”;
}

<h4>ASP.NET Core Service Scope</h4>

The Unique Value: @ViewData[“UniqueID”]

<br />
<br />

<partial name=”UniquePartialView”>

Next is a partial view code. The service is injected using @Inject directive and the unique ID is shown.

UniquePartialView.cshtml

@inject IRepository repository

PartialView ID: @repository.GetUniqueID()

The following is an output of the singleton. The unique ID here is the same for the parent view and the child view. Also, if you access the same page in the new browser, it will show the same unique ID. Even if you refresh the page it does not change the unique ID.

AddSingleton


AddScoped

For Scoped, an instance will be created per client request. The following is a ConfigureServices in the Startup.cs. Here I have registered the AddScoped for the above example Paragraph

Startup.cs

public void ConfigureServices(IServiceCollection services)
{
    services.AddScoped<IRepository, MyRepository>();
    services.AddControllersWithViews();
}

The following is an output of AddScoped.  The unique ID here is the same for the parent view and partial view. But the unique ID will change when you refresh the page. This means it will create a new instance for each request.

AddScoped

AddTransient

For Transient, the instance will be created for each request.  To test AddTransient’s lifetime, I have registered the AddTransient in ConfigureServices method in Startup.cs.

public void ConfigureServices(IServiceCollection services)
{
    services.AddTransient<IRepository, MyRepository>();
    services.AddControllersWithViews();
}

The following is an output of AddTransient.  The unique ID here is different for the parent view and partial view. When refreshing the page, it brings up different unique IDs for parent and child view.

AddTransient

This blog explains what is the lifetime for the service and the difference between AddSingleton, AddScoped and AddTransient.

If you have any questions, please leave a comment below.

Categories
ASP.NET Core

Service Injection into View in ASP.NET Core

This blog is about how dependency is injected directly into view. Let us look at it using a small example.

The following is a ColorListService class that returns a list of strings.

Note

Put all your services in a separate folder called Services. So this will help you maintain a project structure

ColorListService.cs

public class ColorListService
{
    public List<string> GetColors()
    {
        return new List<string>() { “Red”, “Blue”, “Green”, “Yellow”, “Violet” };
    }
}

Before you can use a service, you must register for the service. See ASP.NET Service Scope for more information

Startup.cs

public void ConfigureServices(IServiceCollection services)
{
    services.AddTransient<ColorListService>();
    services.AddControllersWithViews();
}

The following is a view code. Here the ColorListService is injected using @Inject Directive. Finally a list of colors is listed using foreach.

ServiceDemo.cshtml

@{
    Layout = null;
    ViewData[“Title”] = “Service Injection into View”;
}

@inject SampleMVCApplication.Services.ColorListService  colors

<h4>Service Injection into View in ASP.NET Core</h4>

@foreach (string item in colors.GetColors())
{
    <div>@item</div>
}

Below is a HomeController code. It has a ServiceDemo() action which will render a ServiceDemo view.

HomeController.cs

public class HomeController : Controller
{
    public IActionResult ServiceDemo()
    {
         return View();
    }
}

The following is the output of the above code

Service Injection into View

This blog explains how to inject the service directly into the view with a small example.

If you have any questions, please leave a comment below.

Categories
ASP.NET Core

Group DropDownList Options in ASP.NET Core

This blog explains how to group options in a DropDownList in ASP.NET Core. Let’s look at it with an example.

This example is going to bind the list of movie names grouped by the release year with the Selected Tag Helper.

The following is the MyViewModelSample class. It has two properties, SelectedMovieID and MoviesList. The SelectedMovieID property will have the selected value of the drop-down list. The MoviesListproperty is what sets up a list of movies.

MyViewModelSample.cs

using Microsoft.AspNetCore.Mvc.Rendering;
public class MyViewModelSample
{
    public int SelectedMovieID { get; set; }
    public List<SelectListItem> MoviesList { get; set; }
}

The following is a controller code. This controller has 2 action methods, Sample() and SampleSubmit(). In the Sample() action method, values are assigned and passed to the view. In SampleSubmit() action method, the selected movie ID is retrieved from the view and passed to another view to be displayed on the page.

HomeController.cs

using Microsoft.AspNetCore.Mvc.Rendering;
public IActionResult Sample()
{
        var vm = new MyViewModelSample();

        var group2018 = new SelectListGroup { Name = “2018” };
        var group2019 = new SelectListGroup { Name = “2019” };

        var movieList = new List<SelectListItem>()
        {
            new SelectListItem() { Value = “1”, Text = “Incredibles 2”, Group = group2018 },
            new SelectListItem() { Value = “2”, Text = “Ralph Breaks the Internet”, Group = group2018 },
            new SelectListItem() { Value = “3”, Text = “Aladdin”, Group = group2019 },
            new SelectListItem() { Value = “4”, Text = “The Lion King”, Group = group2019 },
            new SelectListItem() { Value = “5”, Text = “Frozen II”, Group = group2019 }
        };
        vm.MoviesList = movieList;
        return View(vm);
}

[HttpPost]
public IActionResult SampleSubmit(MyViewModelSample vm)
{
    return View(“SampleResult”, vm.SelectedMovieID);
}

The following is a sample view. @Model.MoviesList is assigned to asp-items to bind a list of movie names. The SelectedMovieID property is assigned to the asp-for, thus providing the selected result.

Sample.cshtml

@{
    Layout = null;
}

@model MyViewModelSample

 <h4>Group DropDownList Options in ASP.NET Core</h4>

<form asp-controller=”Home” asp-action=”SampleSubmit” method=”post”>
      <select asp-items=”@Model.MoviesList” asp-for=”SelectedMovieID”></select>
      <input type=”submit” value=”submit” />
</form>

Below is a result view. The selected move ID will be displayed here.

SampleResult.cshtml

@{
    Layout = null;
}

@model int

<h4>Group DropDownList Options in ASP.NET Core</h4>
<div> The selected movie ID: @Model</div>

The following image is the output of the code above. Here you can see the names of the movies grouped by the movie release year. When the page is submitted it returns the selected movie ID.

Group DropDownList Options

If you have any questions, please leave a comment below.

Categories
ASP.NET Core

Populating Dropdown using Dependency Injection into View in ASP.NET Core

This blog explains how to load a drop-down list in View using a dependency injection, without passing the value from the controller. So that it will reduce the request to the controller. Let us see how to achieve this.

In this blog I have explained two types of drop-down list loading methods. The first one is a list of classes,  the second one is a list of strings. The following are Metals and OptionServices classes. The OptionServices provide a list of colors and a list of metal information (metal name and symbol)

 public class Metals
 {
  public string MetalName { get; set; }
  public string Symbol { get; set; }
 }

 public class OptionServices
 {
  public List<Metals> ListMetals()
  {
    return new List<Metals>()
    {
     new Metals(){ MetalName= “Gold”, Symbol=”Au” },
     new Metals(){ MetalName= “Platinum”, Symbol=”Pt” },
     new Metals(){ MetalName= “Silver”, Symbol=”Ag” }
    };
  }

  public List<string> ListColors()
  {
    return new List<string>() { “Red”, “Blue”, “Green”, “Yellow”, “Violet” };
  }
 }

To use the service, you must register the service in the ConfigureServices  method in the Startup.cs file.

public void ConfigureServices(IServiceCollection services)
{
    services.AddTransient<OptionServices>();
    services.AddControllersWithViews();
}

The one below is the view code. Here I have injected the OptionServices  into view and loaded it into the dropdown list

PopulateDropDown.cshtml

@using SampleMVCWebApplication.Services
@inject OptionServices  Options

<h4>Populate Drop Down List</h4>

Select a Metal: @Html.DropDownList(“metal”, Options.ListMetals().Select(c => new SelectListItem() { Text = c.MetalName, Value = c.Symbol }))

<br />
<br />

Select a Color: @Html.DropDownList(“color”, Options.ListColors().Select(c => new SelectListItem() { Text = c, Value = c }))

The following is a controller code. We do not need to pass any values here to load the drop-down list

public class HomeController : Controller
{
    public IActionResult PopulateDropDown()
    {
        return View();
    }
}

The following is an output of the above code.

Populating-Dropdown

This article explains how to load the dropdown using service with a small example.

If you have any questions about this please leave a comment below.

Categories
ASP.NET Core

Cache Tag Helper in ASP.NET Core

ASP.NET Core has a lot of built-in Tag Helper. The Cache Tag Helper is one of them. It helps to improve the application performance by storing the content in cache. In the ASP.NET core, content placed inside the <cache> tag is stored in the cache. For the First time the content is fetched from the server. The subsequent request will display from the cache until the cache duration expires. The default cache duration is 20 minutes.

The following is a sample of the Cache Tag Helper. This code page will display the current date and time two times. First date and time is a normal one. The second one is a cached date and time, which means that date and time are placed inside the CacheTag Helper.

@{
    ViewData[“Title”] = “Cache Tag Helper”;
    Layout = null;
}

 <h4>Cache Tag Helper</h4>

<div>The Current Time: <b>@DateTime.Now</b> </div>
<br />
<div>
    <cache>The Cache Tag Helper: <b>@DateTime.Now</b></cache>
</div>

The following screenshot shows two dates and time, both are the same because the first request always fetches from the server.

cache tag helper 1

The second screenshot is taken after refreshing the page. Here only the first date and time has been changed, the second date and time shows the same date and time, because it was from the cache and not from the server.

cache tag helper 2

Cache Tag Helper Attributes:

enabled:

This attribute helps to enable or disable the cache content within the Cache Tag Helper. If it is true, it will provide the content in cache. If it is false it will not store the content. The default value is true.

<cache enabled=”true”>
The Cache Tag Helper Date and Time: <b>@DateTime.Now</b>
</cache>

expires-on:

This attribute helps to set an expiration date and  time. The syntax is @new DateTime(<year>,<month>,<date>,<hour>,<minute>,<second>) for example, expires-on=”@new DateTime(2025,5,11,18,19,0)”. This will expire on May 11th 2025 at 6:19 PM

<cache  expires-on=”@new DateTime(2025,5,11,18,19,0)”>
The Cache Tag Helper Date and Time: <b>@DateTime.Now</b>
</cache>

expires-after:

It helps to set a duration time from the first request. For example, an expires-after  value is @TimeSpan.FromSeconds(120) then it will store the cache content 120 seconds from the first requested time. The default value is 20 seconds.

<cache  expires-after=”@TimeSpan.FromSeconds(120)”>
The Cache Tag Helper Date and Time: <b>@DateTime.Now</b>
</cache>

expires-sliding:

It will expire the cache content if it has not accessed it at a particular time. If expires-sliding is 120 seconds @TimeSpan.FromSeconds(120), The page will give the same content if it is refreshed within 120 seconds. If the page is not refreshed for more than 120 minutes, it will expire the cache content and request new content from the web server.

<cache  expires-sliding=”@TimeSpan.FromSeconds(120)”>
The Cache Tag Helper Date and Time: <b>@DateTime.Now</b>
</cache>

Note

If the attribute name starts with expires-*, that attribute expires cache content

vary-by-header:

When setting the vary-by-header, it will update the cache when the header value changes.  vary-by-header=”User-Agent”. This will provide cache content based on the user agent (browser).

<cache  vary-by-header=”User-Agent”>
The Cache Tag Helper Date and Time: <b>@DateTime.Now</b>
</cache>

vary-by-query:

This stores the cache based on the value in the query string. Use commas when specifying multiple values. For example, vary-by-query=”id,name”. It will store the cache based on the id and name value of the query string. If any of the query string value is changed, it will fetch content from the source server instead of cache.

<cache  vary-by-query=”id,name”>
The Cache Tag Helper Date and Time: <b>@DateTime.Now</b>
</cache>

vary-by-route:

This saves the cache based on the value route values. It only sends a request when the route value changes. Use a comma separator to store cache based on multiple route values. If var-by-route = “id”, the cache content will vary based on the route id value.

<cache  vary-by-route=”id”>
The Cache Tag Helper Date and Time: <b>@DateTime.Now</b>
</cache>

vary-by-cookie:

It stores the cache based on the cookie value. A comma separator is used to specify multiple cookie values. If the cookie value changes, it will update the cache with new content.

<cache  vary-by-cookie=”.AspNetCore.Identity.Application”>
The Cache Tag Helper Date and Time: <b>@DateTime.Now</b>
</cache>

vary-by-user:

It stores the cache based on the logged in user. It accepts boolean values true or false. So it determines whether or not to save the cache value.

<cache  vary-by-user=”true”>
The Cache Tag Helper Date and Time: <b>@DateTime.Now</b>
</cache>

vary-by:

This attribute lets you store cache values based on any string values. The vary-by attribute may be any string value.  In the blow example vary-by=”@Model” so the cache will refresh the content based on the @Model value.

<cache  vary-by=”@Model”>
The Cache Tag Helper Date and Time: <b>@DateTime.Now</b>
</cache>

priority:

It helps to provide guidance to the cache provider. High, Low, NeverRemove, Normal are the list of priority attributes. The time of the cache memory problem, the cache provider will remove the low priority cache. The priority attribute is only a suggestion. If the priority attribute value is ‘NeverRemove’ it doesn’t mean it will never expire or be removed.

<cache  priority=”High”>
The Cache Tag Helper Date and Time: <b>@DateTime.Now</b>
</cache>

This article explains what a cache tag helper is, how it works, and what different attributes it contains.

If you have any questions, please leave a comment below.